
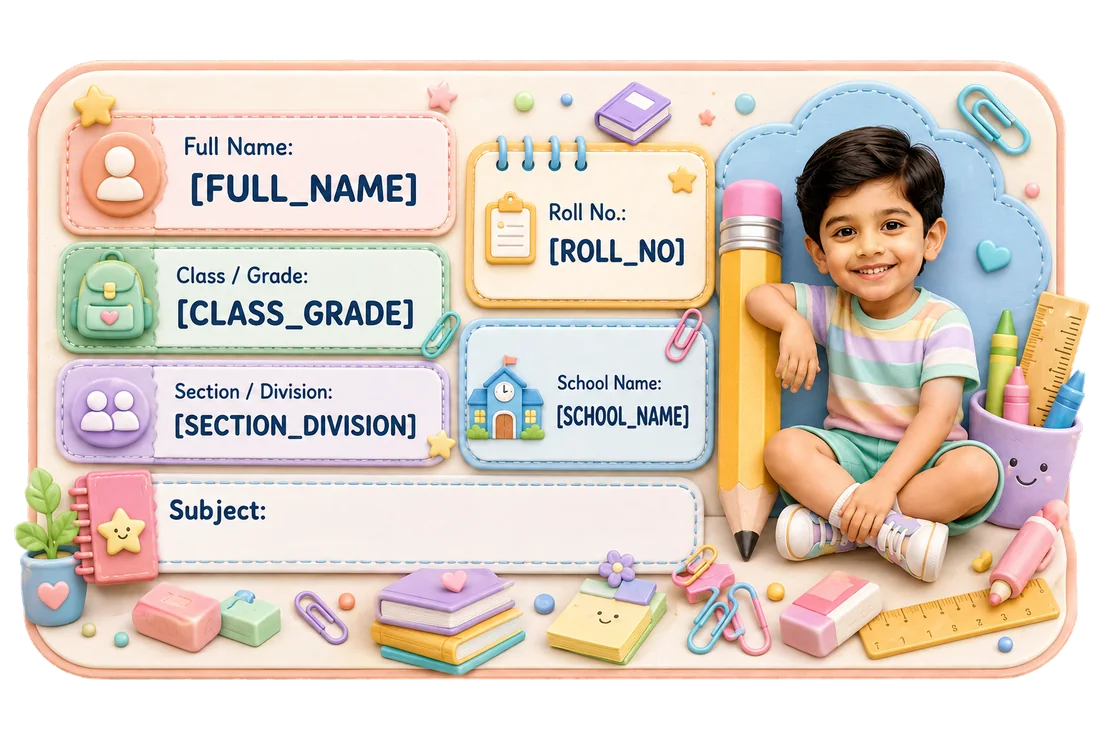
Quick answer: what is the best Name Slip format?
For many everyday school books and notebooks, a strong starting format is:
CHILD NAME
CLASS + SECTION
For example:
ANANYA SHARMA
CLASS 1A
If the school frequently uses roll numbers, a fuller format can be:
ANANYA SHARMA
CLASS 1A · ROLL NO. 11
If the book belongs to a specific subject, the subject may be added:
ANANYA SHARMA
CLASS 1A
MATHEMATICS
A photo can be added when it genuinely helps recognition and there is enough room.
The right format is not the one with the most fields.
It is the one where the important fields remain easy to read.
On this page
- Quick answer: what is the best Name Slip format?
- The 8 Name Slip formats at a glance
- Layout 1 — Name only
- Layout 2 — Name + Class
- Layout 3 — Name + Class + Section
- Layout 4 — Name + Class + Section + Roll Number
- Layout 5 — Name + Subject
- Layout 6 — Name + School
- Layout 7 — Photo + Name
- Layout 8 — Photo + Name + Class/Section + Roll Number
- The Dimple hierarchy rule
- What should be largest on a Name Slip?
- How should Class and Section be written?
- Should Roll Number be on the same line as Class?
- Should Subject be printed on the Name Slip?
- Should the school name be included?
- Where does the photo go?
- What if the child has a long name?
- How many lines should a Name Slip have?
- Name Slip format by item
- Name Slip format by information density
- Dimple’s two-size format
- 7 common Name Slip format mistakes
- The 4-step Dimple format decision
- A practical format checklist
- What format should parents start with if they are unsure?
- Does a more detailed Name Slip work better?
- What is the best Name Slip format for a school notebook?
- What is the best format for a project file?
- Before you approve
A school Name Slip can contain just one line:
ANANYA SHARMA
Or it can contain:
ANANYA SHARMA
CLASS 1
SECTION A
ROLL NO. 11
ENGLISH
Photo area (layout example)
Both are technically Name Slips.
But they solve different identification problems.
The question is not simply:
“What information can I fit?”
It is:
“What information needs to be seen first, and what can stay secondary?”
That is where format matters.
A useful school Name Slip should create a clear reading order:
child → school context → optional detail
not:
five equally tiny lines competing for attention.
A simple way to design the format is:
Identity → School Context → Optional Detail → Visual Hierarchy
Start with who the child is.
Then add only the school information that helps identify or route the item.
Then decide whether a photo, subject or school name adds value.
Finally, make sure the layout still reads clearly at the actual printed size.
CLASS 1
CLASS 1A
CLASS 1A · ROLL 11
MATHEMATICS
BRIGHT STARS SCHOOL
ANANYA SHARMA
ANANYA SHARMA
CLASS 1A · ROLL 11
Neutral editorial examples using fictional details. These are not Dimple product previews or promises of editable layouts.
The 8 Name Slip formats at a glance
| Layout | Best for | Information density | Main advantage |
|---|---|---|---|
| 1. Name only | Simple identification | Low | Maximum readability |
| 2. Name + Class | Everyday school books | Low | Adds basic school context |
| 3. Name + Class + Section | Similar names / class routing | Medium | Better classroom identification |
| 4. Name + Class + Section + Roll No. | Schools that actively use roll numbers | Medium-high | More precise routing |
| 5. Name + Subject | Subject notebooks | Medium | Makes book purpose obvious |
| 6. Name + School | Context-specific use | Medium | Adds institution context |
| 7. Photo + Name | Visual recognition | Medium | Adds another visual identifier |
| 8. Photo + Name + School Details | Detailed personalised layout | High | Maximum personalization when space allows |
This table is a decision guide, not a school rule.
The school’s own labeling instructions should always come first.
Layout 1 — Name only
Example
ANANYA SHARMA
This is the simplest possible Name Slip.
It can work when:
- the school does not require class details,
- the item is already clearly tied to a particular class,
- the child’s name alone is enough to distinguish ownership,
- the available label area is small,
- you want the cleanest possible design.
Strength
Maximum readability.
The name gets all the available visual attention.
Trade-off
If two children have similar names, or the item is found outside the classroom, the lack of class/section context may make routing harder.
Best design rule
Make the name the dominant element.
Do not fill the remaining space with decorative text merely because space exists.
Layout 2 — Name + Class
Example
ANANYA SHARMA
CLASS 1
This is one of the most practical school formats.
It identifies:
- the child,
- the class.
That can be enough for many:
- notebooks,
- textbooks,
- workbooks,
- project files.
Strength
Good balance between:
- simplicity,
- school context,
- readability.
Trade-off
If the school has several sections for the same class, class alone may not fully route the item.
Best design rule
Keep:
ANANYA SHARMA
larger than:
CLASS 1
The child’s name should usually remain the first thing the eye reads.
Layout 3 — Name + Class + Section
Example
ANANYA SHARMA
CLASS 1 · SECTION A
or:
ANANYA SHARMA
CLASS 1A
This is a strong default when section matters.
It can work well for:
- school notebooks,
- files,
- worksheets,
- classroom books.
Strength
Adds useful routing information without becoming too dense.
Trade-off
Section may change with a new academic year.
That means this format is less reusable across years than a name-only label.
Best design rule
Keep class and section visually grouped.
Do not make them compete with the child name as two equally large headings.
Layout 4 — Name + Class + Section + Roll Number
Example
ANANYA SHARMA
CLASS 1 · SECTION A
ROLL NO. 11
This format can be useful when the school actively uses roll numbers.
Strength
More precise identification.
Particularly useful when:
- several children share similar names,
- teachers use roll numbers operationally,
- submitted work is sorted by roll number.
Trade-off
This is a more variable format.
Class, section and roll number can all change.
Best design rule
Treat roll number as a supporting field, not the visual headline.
The hierarchy should normally be:
- Name
- Class/Section
- Roll number
not:
all three at identical size.
For guidance on which fields are actually necessary, see:
Layout 5 — Name + Subject
Example
ANANYA SHARMA
MATHEMATICS
or:
ANANYA SHARMA
CLASS 1A
MATHEMATICS
This can be useful when a child carries several visually similar notebooks.
Strength
Helps answer two questions quickly:
Whose book is this?
and:
Which subject is it for?
Trade-off
Subject is a highly variable field.
A “MATHEMATICS” label cannot naturally serve an English notebook.
Best design rule
Do not duplicate the subject if the book cover already displays it prominently.
If the notebook already has:
SCIENCE
printed clearly on the front, adding the same word again may add little value.
For decisions about pre-printing changing information, see:
Pre-Personalized vs Writable Name Labels: Which Is Better for School Books?
Layout 6 — Name + School
Example
ANANYA SHARMA
BRIGHT STARS SCHOOL
A school-name field can be useful in some situations.
But it should not be treated as mandatory.
Strength
Adds institutional context.
This may help when belongings:
- move between activities,
- travel outside the classroom,
- are shared across campuses or school events.
Trade-off
School name is more identifiable information.
It also uses valuable layout space.
Best design rule
Include it only when it serves a real purpose.
A simple notebook used inside one classroom may not need:
name + school + class + section + roll number + subject
all at once.
For privacy-oriented field selection, see:
What Should You Put on a Child’s School Name Slip? Name, Class, Section, Roll Number & Privacy Guide
Layout 7 — Photo + Name
Example
Photo area (layout example)
ANANYA SHARMA
This is a strongly personalised format.
A child photo adds another visual identifier.
Strength
The photo can make the design easier to distinguish visually from other children’s belongings.
It can also make the Name Slip feel much more personal.
Trade-off
The photo uses layout space.
It is also an additional identifiable detail.
Best design rule
The photo should not force the name into tiny text.
If the photo becomes visually dominant while the name becomes difficult to read, the hierarchy has failed.
For a full photo-vs-text decision guide:
Photo Name Slips vs Text-Only Name Labels: Which Is Better for School?
Layout 8 — Photo + Name + Class/Section + Roll Number
Example
Photo area (layout example)
ANANYA SHARMA
CLASS 1A
ROLL NO. 11
This is the most information-dense format in this guide.
It works when:
- multiple school fields are useful,
- the label has enough space,
- the photo remains meaningful,
- the text still reads clearly.
Strength
Combines:
- visual recognition,
- child identity,
- school routing information.
Trade-off
This format is the easiest to overcrowd.
Long names, multiple fields and a photo all compete for the same area.
Best design rule
Do not solve crowding by shrinking everything.
Instead:
- remove optional fields,
- choose the more appropriate size,
- simplify the theme where possible,
- check the final preview.
For size decisions:
What Size Name Slip Do You Need? A Visual Guide for School Books, Notebooks, Files & Pencil Boxes
The Dimple hierarchy rule
A well-designed Name Slip should usually have a visual hierarchy.
A practical starting order is:
1. CHILD NAME
The main identity.
2. CLASS / SECTION
School routing.
3. ROLL NUMBER / SUBJECT
Supporting context.
4. PHOTO / THEME
Visual identification and personalization.
This is not a universal law.
But it helps prevent a common design problem:
every element trying to be the headline.
What should be largest on a Name Slip?
Usually:
the child’s name
because that is the primary ownership signal.
The exact hierarchy may change when:
- the school has a required format,
- subject is essential,
- roll number is operationally important,
- photo recognition is a deliberate family choice.
But if the child’s name is visually buried under:
- a giant theme character,
- a large photo,
- oversized class text,
- decorative elements,
the label may look attractive while becoming less useful.
How should Class and Section be written?
There is no universal required style.
Examples include:
CLASS 1 · SECTION A
CLASS 1A
1-A
GRADE 1 · SECTION A
Follow the school’s terminology.
If the school says:
Class
use:
Class
Do not change it to:
Grade
merely because another website uses that word.
Consistency with the school is more useful than forcing a generic format.
Should Roll Number be on the same line as Class?
It can be.
For example:
CLASS 1A · ROLL 11
can work when space is limited.
A separate line may be easier to scan when:
- the text is longer,
- the label is larger,
- the design is already busy.
The right answer depends on readability.
Do not optimize the line count just to make the format look compact.
Should Subject be printed on the Name Slip?
A subject can help distinguish similar notebooks, but it is item-specific. Avoid duplicating a subject already clear on the cover. Dimple’s current Name Slip subject area is left blank for the individual book; the subject examples in this guide explain general layouts, not a preprinted-subject option.
Should the school name be included?
Not automatically.
Ask:
Does the school name actually help identify or return this item?
For some use cases: yes.
For others: no.
Also consider public visibility.
A school name on:
- an internal notebook
is a different decision from school name displayed on:
- a public-facing bag.
Use only the information you need.
Where does the photo go?
A photo can sit beside the name or within a themed portrait area. Its position depends on the actual template. Choose from the current designs and check the preview rather than assuming that photo placement can be moved freely.
What if the child has a long name?
Keep the identifying name readable, reduce competing information where the format permits, and inspect both sizes in the actual preview. For the full decision, read the guide to long names on school Name Slips.
How many lines should a Name Slip have?
There is no ideal number.
The label can be:
1 line
2 lines
3 lines
or more
if the actual size supports it.
The useful question is:
Can the parent, child or teacher read the important information quickly at normal viewing distance?
Do not chase:
“2-line Name Slip”
or:
“3-line Name Slip”
as a design rule.
Name Slip format by item
Different school items can justify different information density.
| Item | Practical format starting point |
|---|---|
| Textbook | Name + Class/Section |
| Notebook | Name + Class/Section; Subject if useful |
| Project file | Name + Class + Section + Roll No. where relevant |
| Workbook | Name + Class |
| Small stationery | Shorter format if space permits |
| Public-facing bag | Consider minimising visible personal details |
| Water-exposed item | First choose a product with verified properties for the use case |
For the broader item-selection decision:
Name Slip format by information density
LOW DENSITY
Name
Good when:
- simple identification is enough.
MEDIUM DENSITY
Name
Class/Section
Good when:
- school context helps.
MEDIUM-HIGH DENSITY
Name
Class/Section
Roll No. or Subject
Good when:
- routing needs more precision.
HIGH DENSITY
Photo
Name
Class/Section
Roll No.
Subject/School where useful
Good only when:
- there is enough physical space,
- the final preview remains clear.
The more fields you add, the more important hierarchy becomes.
Dimple’s two-size format
Dimple’s current Name Slip sheet is designed with two individual slip sizes:
- 20 large slips — approximately 8.5 × 5 cm
- 5 small slips — approximately 5 × 4 cm
One child/details/theme set is used per sheet.
The large and small sizes are not “better” and “worse.”
They solve different placement problems.
If your format contains:
- a long name,
- photo,
- class,
- section,
- roll number,
the larger size may provide more breathing room.
For a deeper size decision:
What Size Name Slip Do You Need? A Visual Guide for School Books, Notebooks, Files & Pencil Boxes
7 common Name Slip format mistakes
1. Making every field equally large
The label loses hierarchy.
2. Adding every possible field
More information can reduce readability.
3. Making the photo too dominant
The child name should still remain easy to read.
4. Using very small text to force a complex format
Remove optional detail instead.
5. Repeating information already printed on the book
For example, printing the subject again when the cover already says it clearly.
6. Locking changing information into every label
Section, roll number and subject can change.
7. Approving without checking the final personalised preview
A format that looks good in a generic mockup may behave differently with:
- a long name,
- a different photo,
- more school fields.
The 4-step Dimple format decision
Before approving your Name Slip:
STEP 1 — IDENTITY
What is the minimum information needed to identify the child?
Usually the child’s name.
STEP 2 — SCHOOL CONTEXT
Does class, section, roll number or subject genuinely help?
Add only what serves the use case.
STEP 3 — OPTIONAL DETAIL
Does a photo or school name add enough value?
Do not add it automatically.
STEP 4 — VISUAL HIERARCHY
Can someone read the important information quickly?
If not, simplify.
A practical format checklist
Before ordering, check:
NAME
- correctly spelled
- easy to read
- visually dominant enough
CLASS
- current
- correct terminology
SECTION
- confirmed
- still relevant
ROLL NUMBER
- confirmed
- useful to the school
SUBJECT
- item-specific
- not unnecessarily repeated
SCHOOL NAME
- useful
- appropriate for the item’s visibility
PHOTO
- parent is comfortable using it
- does not crowd the text
SIZE
- enough room for the chosen format
PREVIEW
- all fields readable
- no awkward line breaks
- design still feels balanced
What format should parents start with if they are unsure?
Start simple.
A good default for many school books is:
NAME
CLASS + SECTION
Then add:
- roll number,
- subject,
- school name,
- photo
only when each one has a reason to be there.
This approach usually creates a cleaner label than starting with every available field and trying to make them fit.
Does a more detailed Name Slip work better?
Not automatically.
Detailed formats help when the information improves identification.
But additional fields can also:
- make text smaller,
- reduce visual balance,
- shorten how long unused labels remain current,
- display more personal information than needed.
Use detail deliberately.
What is the best Name Slip format for a school notebook?
For many notebooks:
NAME + CLASS/SECTION
is a strong starting point.
Add subject if:
- several notebooks look alike,
- the cover does not already show the subject clearly.
Add roll number if:
- the school actively uses it.
Add photo if:
- the family values the additional visual cue,
- the layout still remains readable.
What is the best format for a project file?
Project files often benefit from slightly more school context because they may be:
- collected,
- stacked,
- returned later,
- handled by different teachers.
A useful starting format can be:
NAME
CLASS + SECTION
ROLL NO.
Add subject/project name only if it serves the file.
Before you approve
A school Name Slip does not need the maximum number of fields.
It needs the right visual order.
Start with:
Identity
Then add:
School context
Then decide:
Optional detail
Then check:
Visual hierarchy
The strongest format is usually the one where:
- the child’s name is easy to find,
- school information stays readable,
- optional fields have a clear purpose,
- the design does not feel crowded,
- the personalised preview still looks balanced.
So instead of asking:
“How many things can I put on the Name Slip?”
ask:
“What should the reader notice first?”
That is the difference between simply filling a label and designing a useful one.
For related decisions, see choosing a photo for a Name Slip.
Frequently asked questions
What is the best format for a school Name Slip?
For many school books, a simple Name + Class/Section format is a good starting point. Add roll number, subject, school name or photo only when each detail serves a real identification purpose.
Should the child’s name be the biggest text?
Usually, yes. The name is the main ownership signal. Class, section, roll number and subject can be visually secondary unless the school requires another hierarchy.
Should roll number be included on a school Name Slip?
Include it when the school actively uses roll numbers and the number is confirmed. It is not automatically necessary for every child or every item.
Should the subject be printed on the Name Slip?
Only if it helps distinguish similar notebooks. If the book already shows the subject clearly, printing it again may not add much value.
Should the school name be included?
Only when it is useful. Consider both identification value and how publicly visible the item will be.
Can a photo be added to a Name Slip format?
Yes, where the actual Dimple design supports photo personalization. The photo should not make the child’s name or school details difficult to read.
How many lines should a Name Slip have?
There is no fixed ideal number. Use as many lines as the actual label size can support while keeping the important information easy to read.
Which Dimple Name Slip size is better for a detailed format?
Dimple’s current Name Slip sheet uses large slips of approximately 8.5 × 5 cm and small slips of approximately 5 × 4 cm. A more detailed format may benefit from the larger size, but the final decision should be based on readability and the personalized preview.
Ready to check a design with your child’s details?
Choose a Name Slip design
Compare the current designs and inspect the personalized preview before ordering.
Browse Dimple Name SlipsUnderstand the steps
See how details, photo, preview review and ordering fit together.
How personalization works